In this guide, we’ll break down the concept of conditions into three easy-to-follow steps:
- What are conditions?
- How to set up conditions in Bricks Builder
- How to stack conditions for more complex logic
Let’s get started!
Step 1: What Exactly Are Conditions?
Conditions in Bricks Builder allow you to control the visibility of elements on your website based on specific rules. This means you can show or hide sections, buttons, images, or any other elements depending on factors like user status, time of day, or even the browser being used.
For example, you can display a call-to-action (CTA) only to logged-in users or a specific banner during a promotional period. The best part? You don’t need to write any custom code to achieve this!
Why Use Conditions?
- Personalisation: Tailor your website experience based on user behaviour or preferences.
- Dynamic Content: Show different content based on time, date, or user role.
- Improved User Experience: Hide irrelevant elements to certain users, making your site cleaner and more intuitive.
Step 2: How to Set Up a Condition in Bricks Builder
Setting up conditions in Bricks Builder is straightforward. Let’s walk through the process using a Call to Action (CTA) section as an example.
Step-by-Step Guide:
- Select the Element: First, choose the element to which you want to apply the condition. This could be a section, button, image, or any other element. In our example, we’ll use a CTA section.
- Open the Conditions Panel: With the element selected, navigate to the left-hand panel in the Bricks Builder interface. At the top, you’ll see a Conditions button. Click on it to open the conditions builder.
3. Add a New Condition: Click the + button to add a new condition. You’ll see a variety of options to choose from, such as:
- Post: Control visibility based on post ID, title, or status.
- User: Show or hide elements based on user login status, role, or ID.
- Day and Time: Display elements only on specific days or times.
- Other: Use dynamic data like browser type, operating system, or referrer URL.
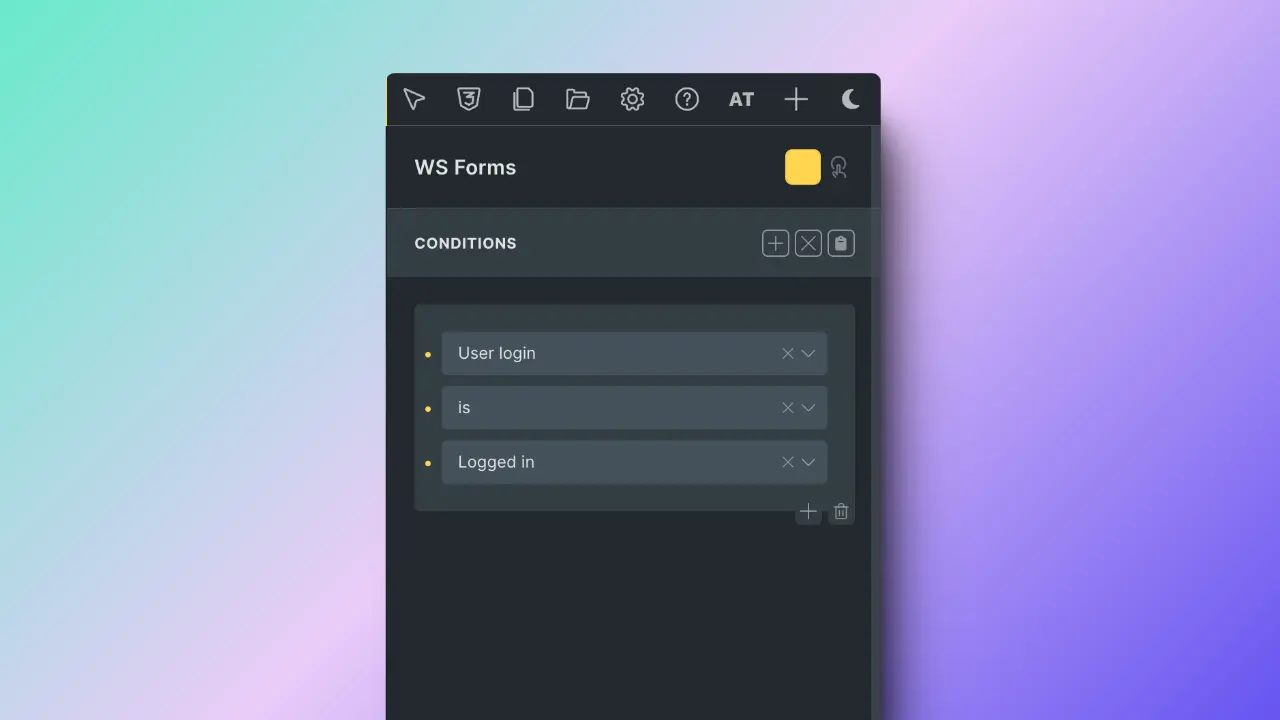
4. Set the Condition: Let’s show the CTA only to logged-in users for this example. Select User Login Status from the list, then choose is and Logged In. Save the condition.
5. Test the Condition: Open an incognito window (where you’re not logged in) and check if the CTA is hidden. Then, log in and verify that the CTA is visible.
That’s it! You’ve successfully set up a condition.
Step 3: Stacking Conditions for More Complex Logic
Now that you know how to set up a basic condition, let’s explore how to stack multiple conditions to create more complex rules.
Why Stack Conditions?
Stacking conditions allows you to refine your logic. For example, you can show a CTA only to logged-in users and only if they’re using a specific browser, or you can show a banner to users from a particular referrer URL.
Example: Combining Multiple Conditions
Let’s say you want to show a CTA to users who:
- Are logged in and
- Are not administrators or
- Are coming from Facebook.
Here’s how you can set this up:
1. Add the First Condition: Select the CTA section and add a condition for User Login Status. Set it to is and Logged In.
2. Add a Second Condition: Click the + button to add another condition. This time, choose User Role and set it to “is not” an Administrator.
3. Add an OR Condition: To add an alternative condition, click the Add button, which will automatically add an ‘Or‘ condition. Now, add a condition for the Referrer URL. Set it to contains and type in facebook.com.
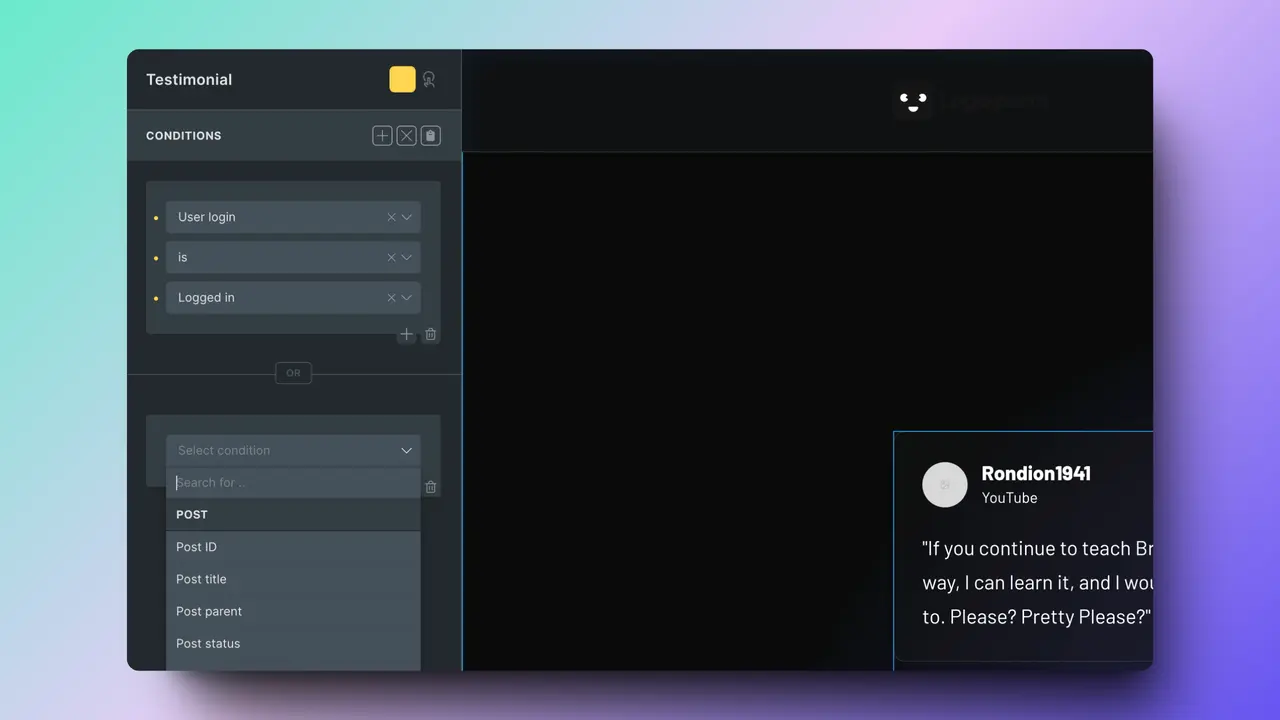
Now, the CTA will be shown to users who are logged in, not administrators or users coming from Facebook, regardless of their login status.
Advanced Stacking
You can continue stacking conditions to create even more granular logic. For example, you can add conditions based on the time of day, the browser being used, or even the operating system. The possibilities are endless!
Real-World Example: Dynamic Course Pages
Let’s look at a real-world example of how conditions can be used on a course website. Imagine you have a course page with a featured video. However, not all courses have a video, especially new ones. In this case, you can set up conditions to show a featured image when no video is available.
How It Works:
1. Check for Video: Use a condition to check if the video URL field (from Advanced Custom Fields) is empty. If it’s empty, show the featured image.
2. Show Video: If the video URL is not empty, display the video instead of the image.
This setup ensures that your course pages always look polished, whether or not a video is available.
Conclusion: Unlock the Power of Conditions in Bricks Builder
Conditions in Bricks Builder are a game-changer for creating dynamic, personalised websites. Whether you’re showing content based on user roles, time of day, or referrer URLs, conditions allow you to control the visibility of elements easily.
By stacking conditions, you can create complex logic that tailors your website experience to each user, improving functionality and user experience.
Ready to Learn More?
If you found this guide helpful and want to continue mastering Bricks Builder, check out our Bricks Builder Masterclass or explore more tutorials on our YouTube channel.

