Often, you might scatter identical pieces of information across different parts of a website, such as addresses in the header, footer, and contact page. Updating these details in each location takes time and effort.
The Solution: ACF Pro’s Options Pages
Options Pages in ACF Pro allow you to centralize these details, so the change is instantly reflected site-wide when an update is made.
Setting Up ACF Pro Options Pages:
- Back-End Options Page: Once ACF Pro is installed, create an Options Page named ‘Business Details’ (or any name you choose) in the dashboard. This is where you’ll be able to add or change details.
- Creation: Navigate to the ‘Options Pages’ section in ACF Pro.
- Associating Field Groups:
- After creating an options page, you’ll associate field groups with it.
- Navigate to ‘Field Groups’ and either use an existing one or create a new one.
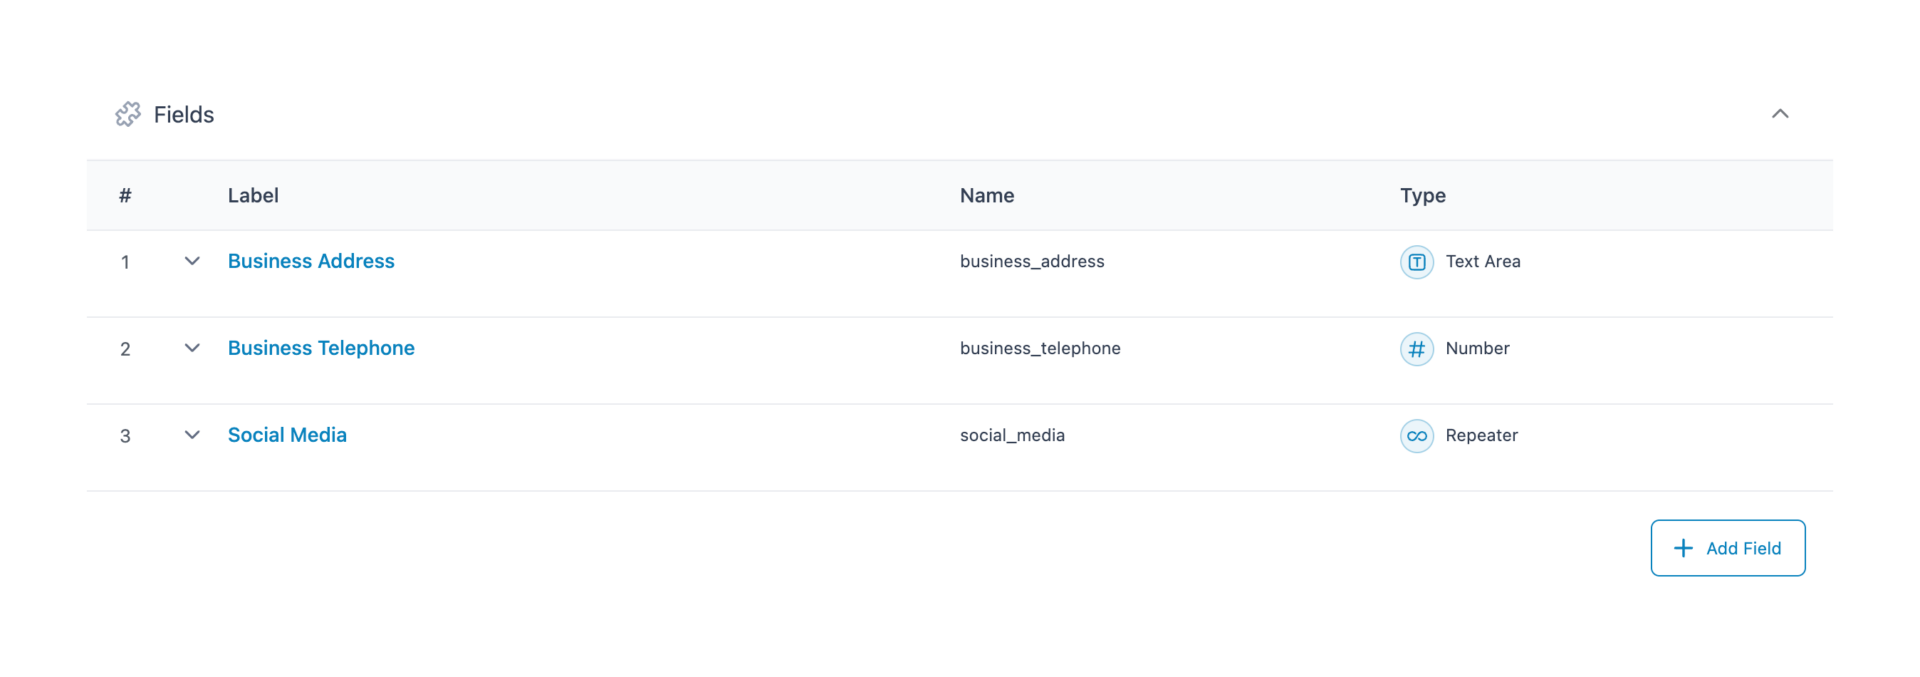
- For instance, create a field group named ‘Business Details’.
- Inside this, you can add text fields for business address, business telephone, email addresses, etc.
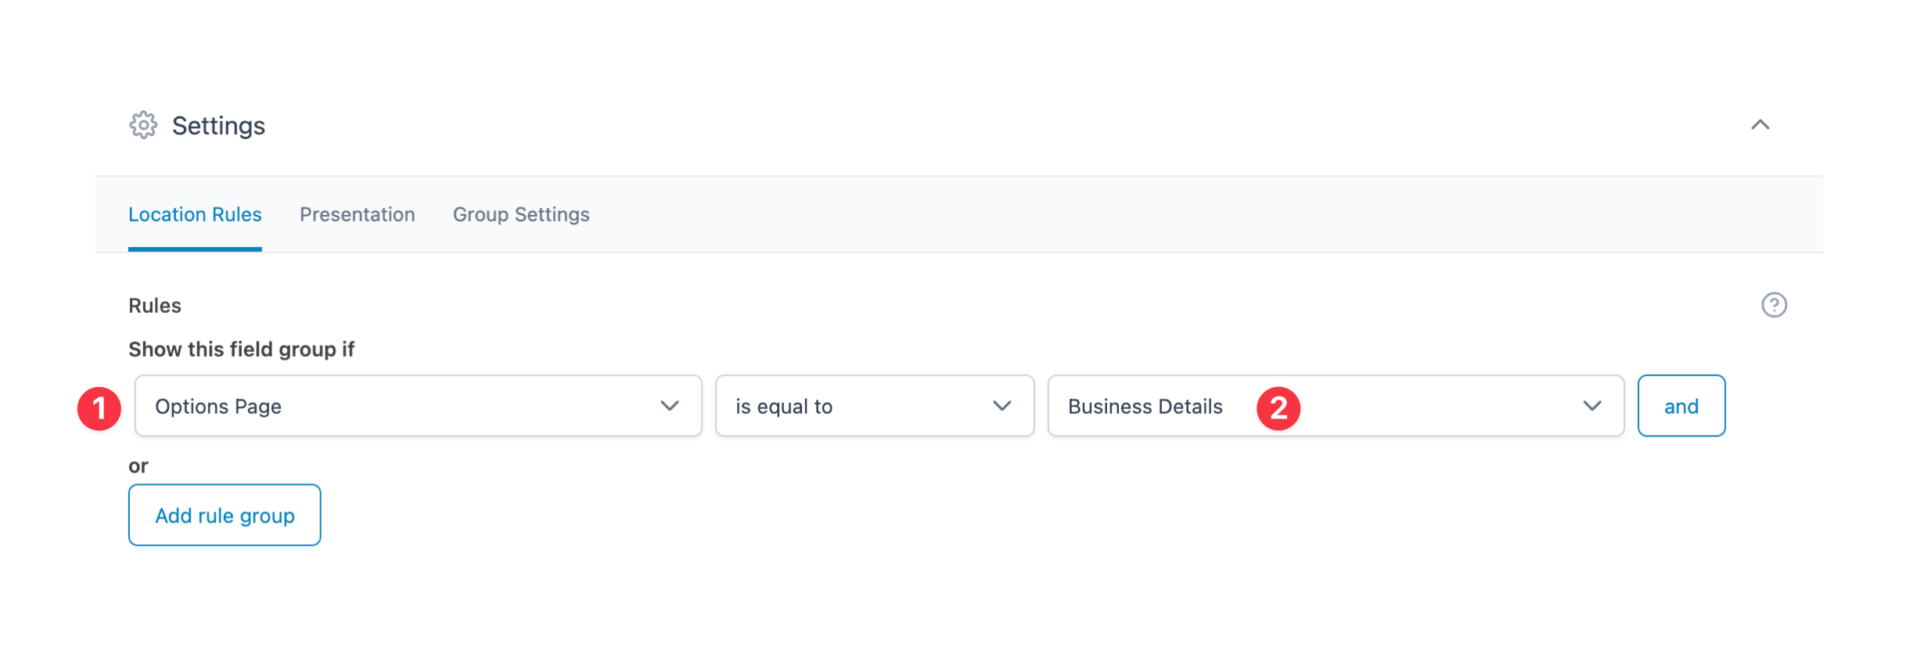
- To associate this field group with your options page, scroll to ‘Location Rules’ at the bottom, select ‘Options Page’ from the drop-down and link it to your earlier created options page, ‘Business Details’.
Incorporating ACF Data into Bricks Builder Designs:
- Using Bricks Builder: Navigate to your template section and customize, for instance, the footer.
- Adding ACF Data:
- Click on the component where you’d like to display the dynamic data, such as a rich text component.
- Select the lightning bolt icon for dynamic data and choose ACF. You’ll see fields like business address, telephone, and email, which you can incorporate.
- Insert these ACF fields where required. These will act as placeholders.
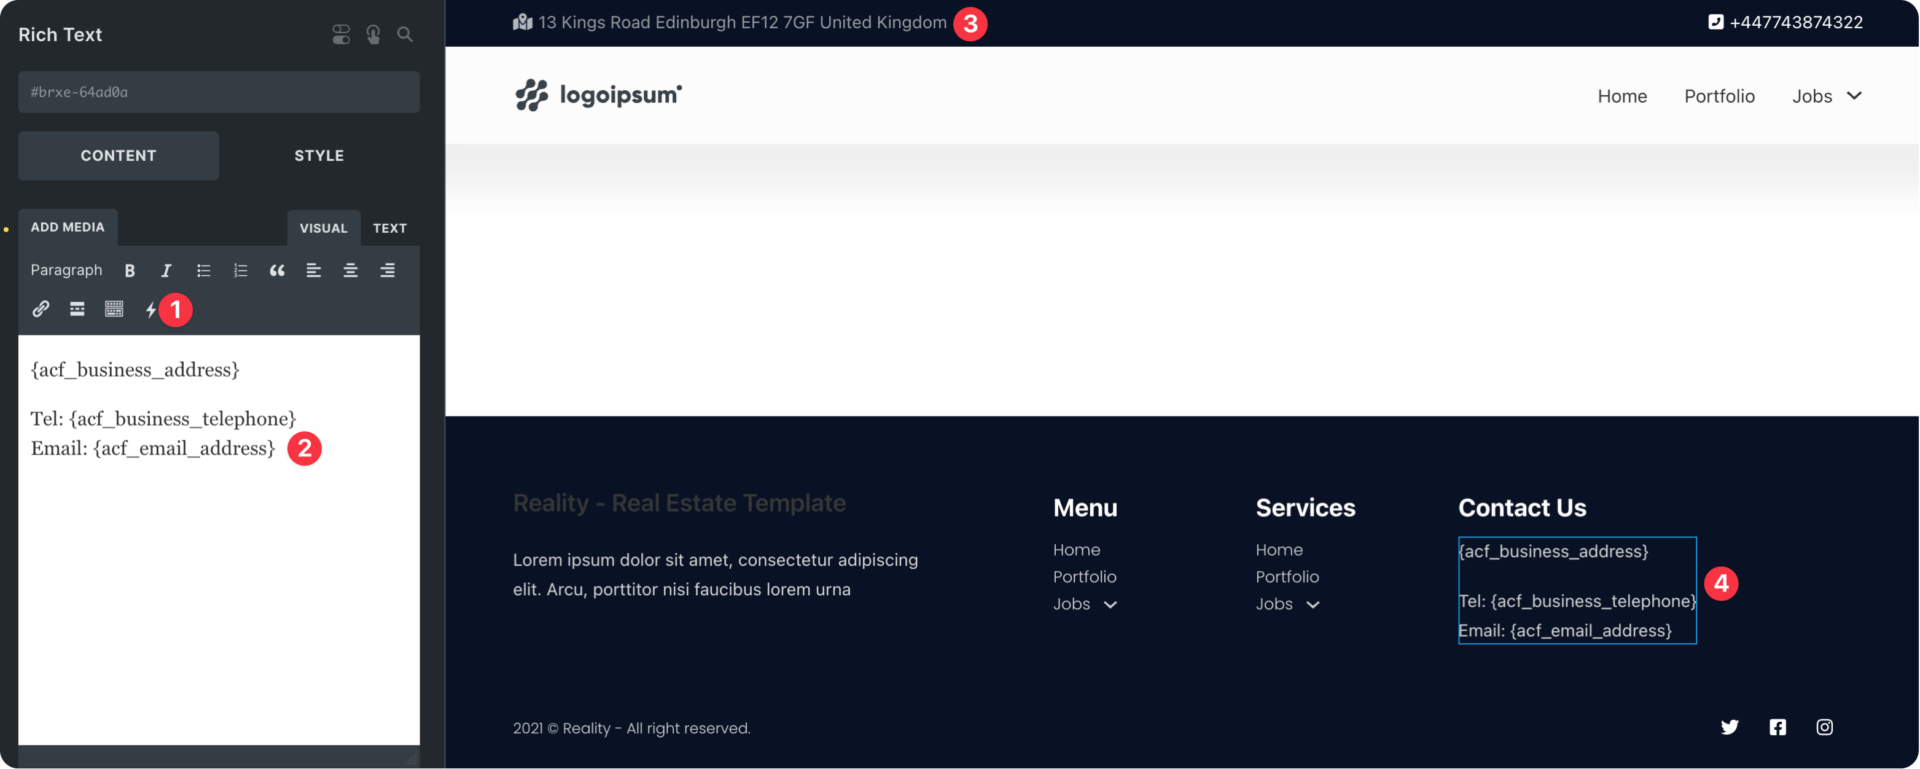
- Real-Time Update: Return to your WordPress dashboard’s ‘Business Details’ after setting up placeholders. Input or update the details there. When you refresh your website page, you’ll see the updated details in every location – header, footer, or elsewhere.
The Major Benefit:
This centralized approach is excellent for designers working with clients. You can empower clients to update vital information without accessing the main design.
So, if you’re seeking a streamlined solution for global information spread across your site, ACF Pro’s options pages are an invaluable resource. Dive in, explore, and make website design hassle-free!
- ACF Pro: https://jo.my/rdmjt5
- Bricks Builder: https://jo.my/bricks

