Understanding the Relationship
Imagine you’re setting up a job board. Each job (like “Advertising Executive”) is tied to an employer (like “Facebook”). This is a “one-to-many” relationship: one employer can have many job postings. We will exploit this relationship to display the employer details linked to specific job details on your WordPress site.
Setting the Stage with ACF
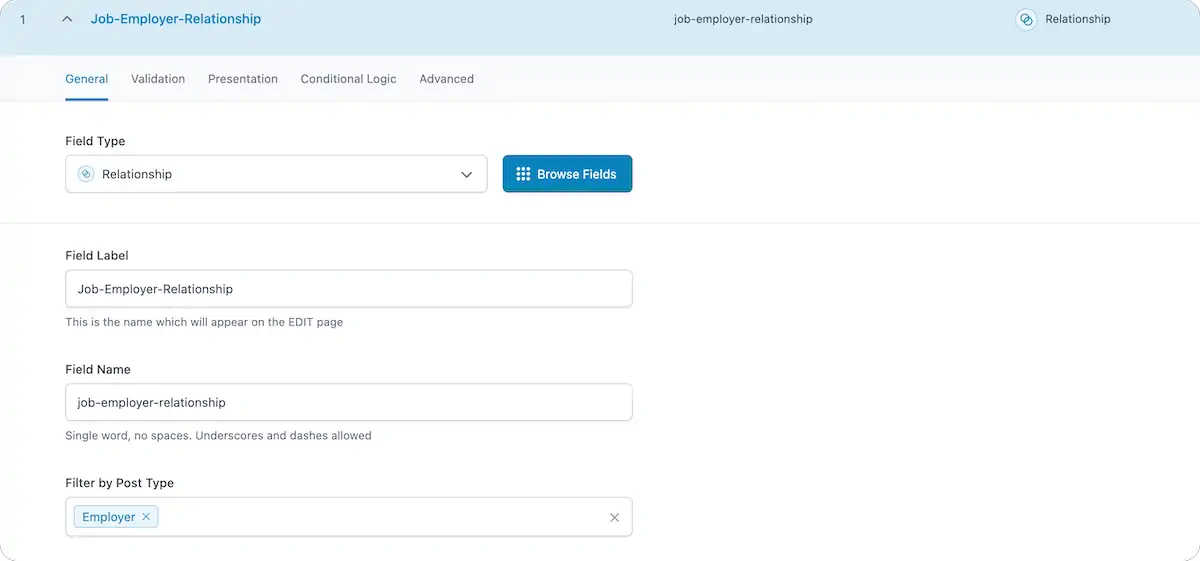
First off, let’s set up a simple relationship between jobs and employers using ACF. You’ll create a “Relationship” field in ACF that connects your job postings to employers. This doesn’t require deep diving into ACF, but it’s essential for displaying the correct info on your job board.

You can add details to each employer, like phone numbers, addresses, and emails, which you’ll later show on the job postings. If this sounds complex, don’t worry – it’s just about linking two sets of information, and I’ll go over these basics in the video.
Merging ACF and Bricks Builder
With your ACF relationship established, the next step is to reflect this data on your website using Bricks Builder. Bricks Builder allows you to create beautiful templates without coding, and it works like a charm with ACF’s dynamic content.
Starting Your Template
Create a single post template for your job listings in Bricks Builder. You’ll want to display details like the employer’s name, phone number, and email address. This is done by inserting elements like a rich text field into your template.
Linking the Data
Now, it’s time to make the magic happen. Here’s how:
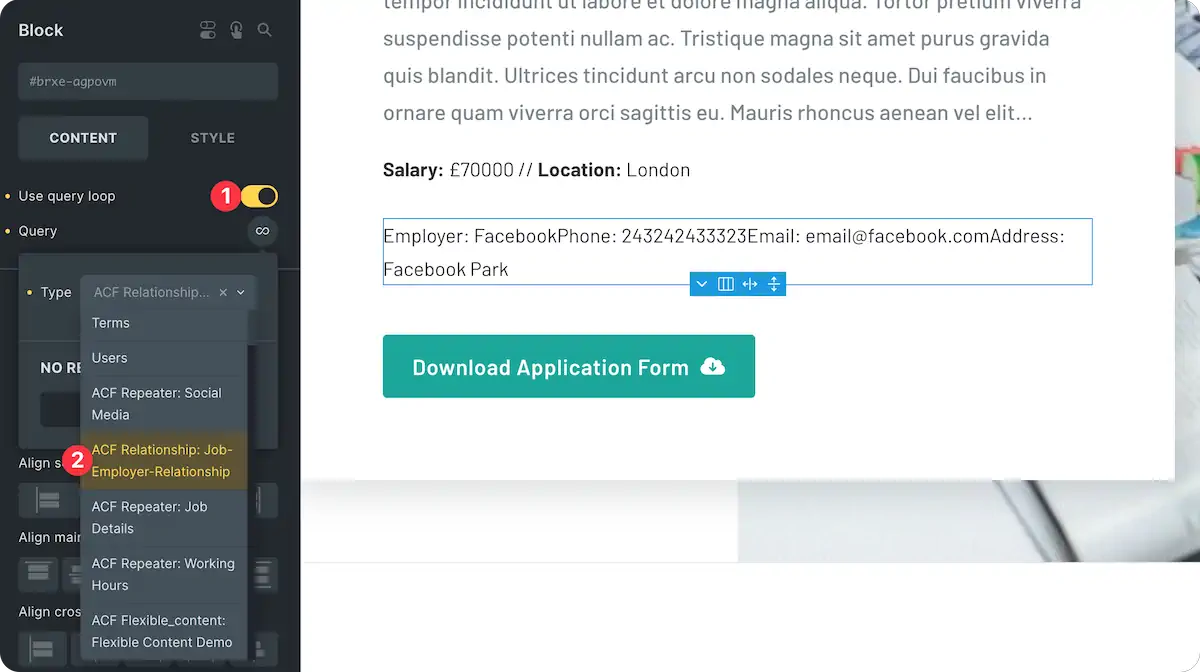
- Enable the Query Loop: This sounds technical, but it’s just a way to tell Bricks Builder, “Hey, we’re going to show a list of items here.”
- Select the Relationship: Inside your Query Loop, you’ll select the ACF relationship you created earlier. This ties the job postings to the correct employer.

Pulling in Dynamic Data
With the relationship selected, drag a rich text element into your template and prepare to pull in dynamic content. Here’s what to do:
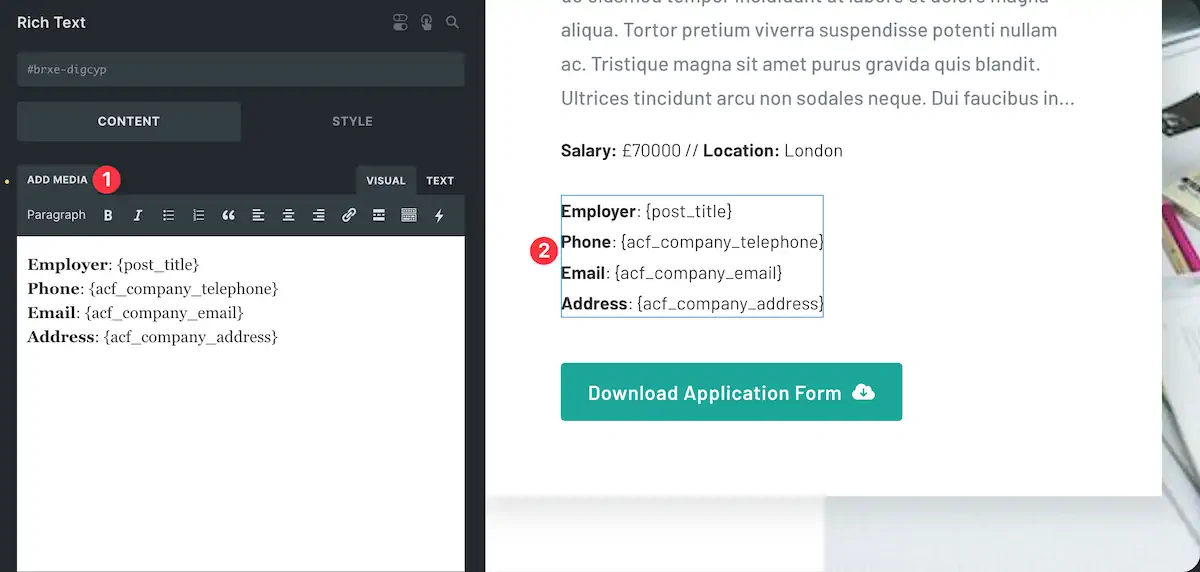
- Insert Employer Name: Use the dynamic data option to insert the employer’s name. It knows to pull the employer’s name (like “Facebook”) instead of the job title because of the ACF relationship.
- Add Contact Details: Similarly, add fields for phone numbers, emails, and addresses, linking each to the corresponding ACF field.

Preview and Tweak
After saving, preview your template to see the details for each job displayed neatly. If you see “Employer: Facebook,” with all the contact info listed, you’ve done it right!
Styling Your Data
The cool thing about using rich text elements is that you can style the details to match your site’s design, giving you both form and function.
What if There’s More Than One Employer?
Suppose a job is associated with multiple employers. Because you set up a loop, Bricks Builder automatically lists all related employers’ details. Add another employer to your ACF relationship, preview your post, and – voilà – the new employer’s details appear!
Conclusion
Using ACF Repeater fields with Bricks Builder isn’t just a powerful way to display dynamic content – it’s a game-changer for site customization. You’ve just learned how to create detailed job listings with associated employer information without a single line of code.
If you’ve followed along, you should have a fully functional job board displaying all sorts of data fetched dynamically from ACF’s Repeater fields. And the best part? It looks just how you want it within your Bricks Builder layout.
Feeling excited about the potential or still have questions? Drop a comment below. This tutorial is just the beginning – endless possibilities are waiting for you with ACF and Bricks Builder. Keep experimenting, and remember: the best way to learn is by doing.

