What is a Repeater Field?
The Repeater Field is a feature in Advanced Custom Fields Pro that enables you to input and manage multiple data sets without knowing exactly how many entries you’ll have. This feature is handy when you have to list varying pieces of information, like working hours for different locations, but need to figure out the exact number of entries you’ll need.
Setting Up a Repeater Field in ACF Pro
Let’s use an example to understand how it works. Say you are building a jobs page and want to display the working hours for various job roles. For this section, you’ll have three types of information: location, day of the week, and working hours. Here’s how you set it up:
- Creating a New Field: Go to your ACF Pro dashboard, open Field Groups, select or create a Field Group and add a new field. Select ‘Repeater‘ from the browse fields option.
- Naming the Field: Give the field a descriptive name, like ‘Working Hours.‘
- Adding Subfields: You’ll see an option to add subfields under your newly created repeater field. Here, you can add fields for ‘Location‘, ‘Day of the Week‘, and ‘Working Hours‘.
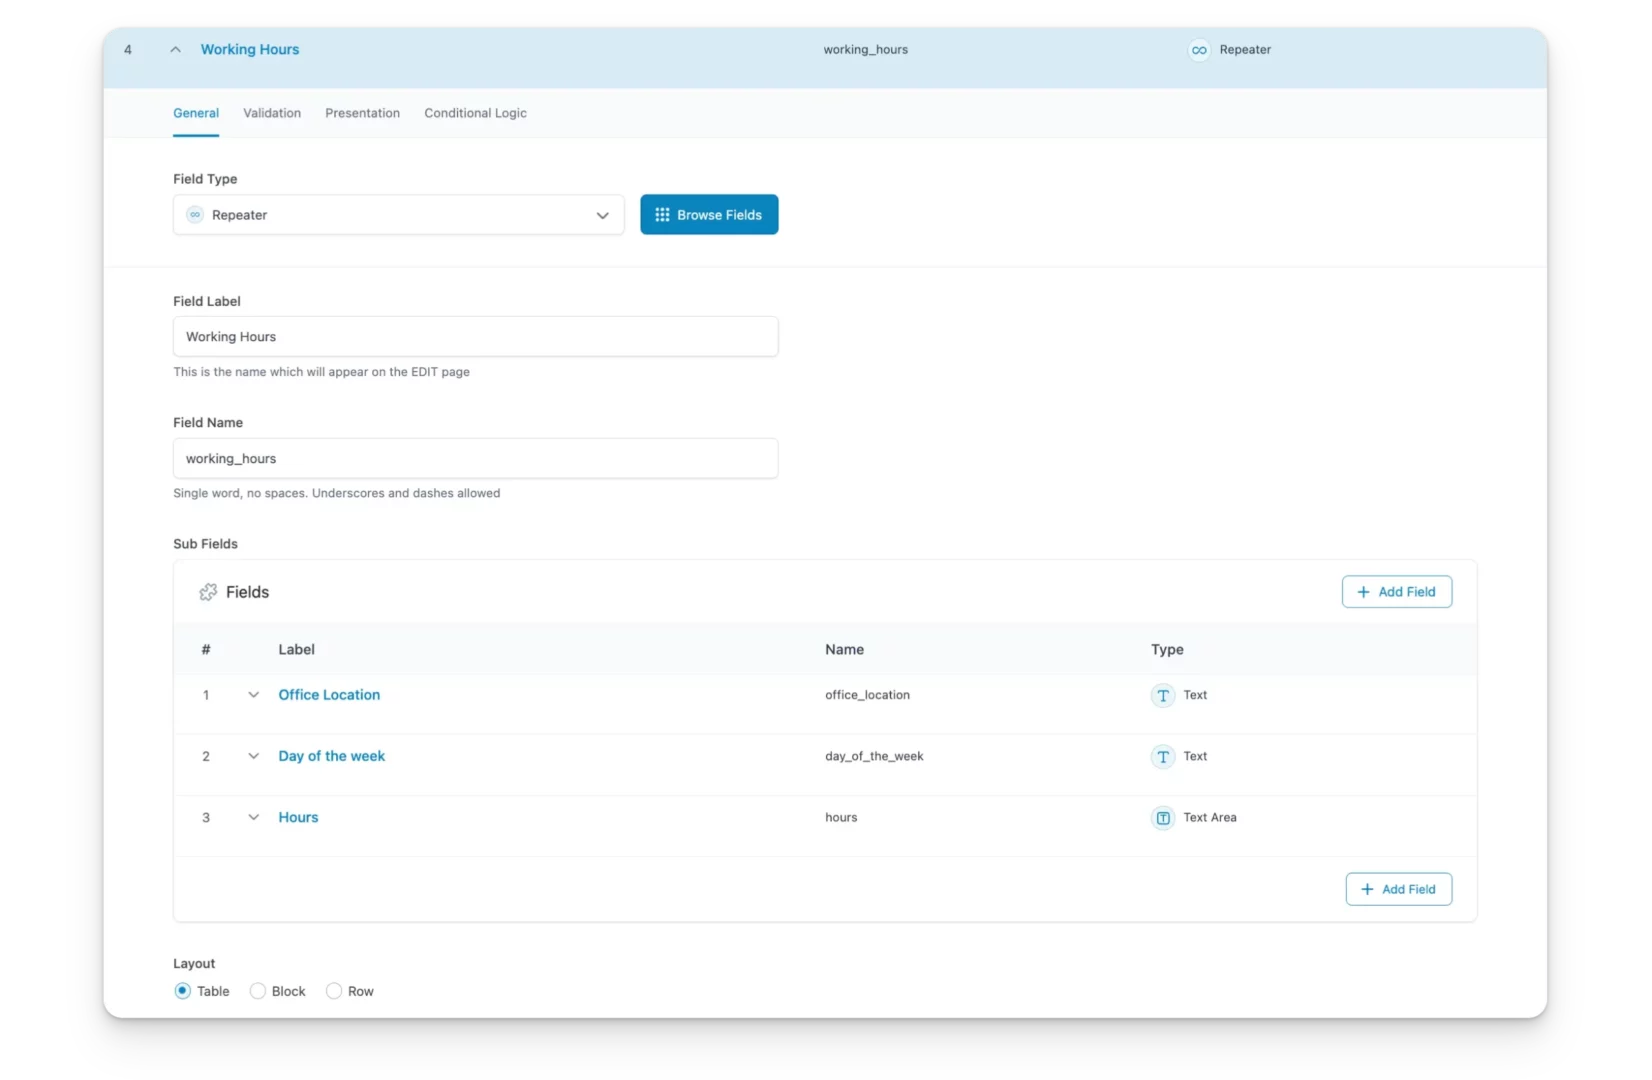
Once you’ve saved the changes, these fields will appear in your custom post types, where you can enter the relevant information.
Integrating ACF Pro with Bricks Builder
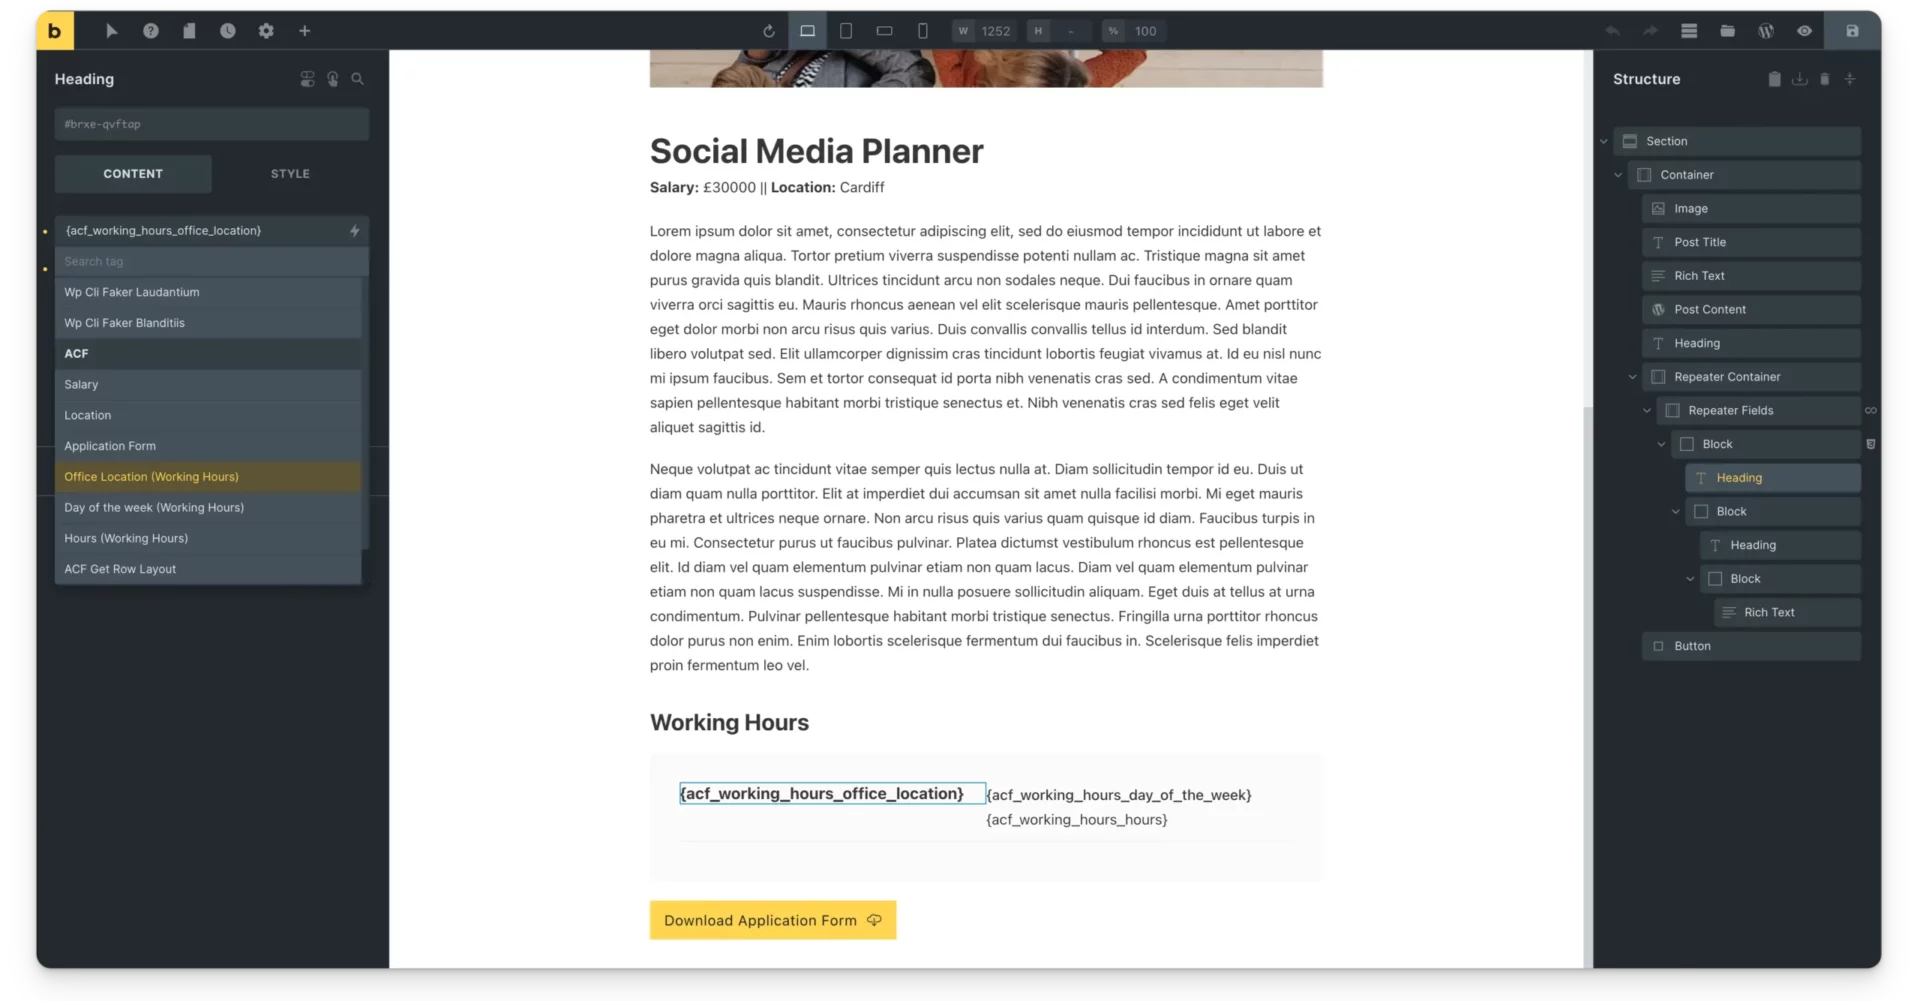
After setting up your repeater fields in ACF Pro, the next step is to display this dynamic content using Bricks Builder. Here’s how:
- Navigate to Templates: If you use templates in Bricks Builder, open the one you wish to edit.
- Add a Container: Underneath the section where you wish to display the working hours, insert a new container element. This container will serve as a placeholder for your dynamic data.
- Create Child Containers: Add child containers for each type of information you wish to display within your main container.
- Add Elements: Add elements like headings or text blocks inside each child container. These will serve to display each piece of data.
- Dynamic Data: Link each element’s ‘Dynamic Data’ option to the respective ACF Pro field.
- Set Query Loop: To make the information repeat dynamically, select the main container and then navigate to the ‘Query Loop’ option in the settings. Choose the repeater field you created in ACF Pro.
Styling and Final Touches
After adding your dynamic data, you can style it to fit the aesthetics of your website. While Bricks Builder offers numerous built-in styling options, you can also write custom CSS for finer control. For instance, you can arrange your entries side by side or in a grid format.
Conclusion
When integrated with Bricks Builder, the Repeater Field feature in ACF Pro offers a powerful way to display dynamic data on your website without diving into complex code. It provides a flexible and scalable way to manage varying data sets, from working hours to any other list you need to display. So try integrating these tools into your workflow and watch your website’s functionality reach new heights.
Happy building!

